


Intro to Flask
Flask is a Python micro-framework for web development and is lightweight, flexible, and easy to use

- Lightweight and Simple: Flask follows a minimalistic approach, allowing you to build only what you need, without unnecessary complexity.
- Modular Design: Flask is highly customizable. You can add functionality through a wide range of extensions, such as database integration, form validation, and authentication.
- Jinja2 Templating Engine: Flask comes with Jinja2, a powerful templating engine that helps in dynamically generating HTML by combining Python logic with HTML syntax.
- Built-in Development Server: Flask includes a simple web server for testing your applications during development, eliminating the need to configure complex production setups during the early stages of development.
- RESTful Support: Flask is a great choice for building RESTful APIs and microservices, thanks to its flexibility and ease of integration with other tools.
Getting Started Tutorial
https://flask.palletsprojects.com/en/3.0.x/quickstart/
- Install Flask
pip install Flask
flask --version
Python 3.10.12
Flask 2.0.1
Werkzeug 2.0.2
- Create a simple “Hello, World!” Flask application:
from flask import Flask

app = Flask(__name__)

@app.route('/')
def hello_world():
    return "<p>Hello, World!</p>"


# This block will only run if the script is executed directly,
# and not if it's imported as a module in another script.
if __name__ == '__main__':
app.run(debug=True)-
Explanation:
Flask(__name__): Creates an instance of the Flask class__name__is a built-in variable that holds the name of the current module. When you run a Python script directly, the__name__variable is set to ‘main’.- If the script is imported as a module in another script, name will be set to the module’s name.
- Flask uses this to determine the root path of the application, so it knows where to look for resources (like templates, static files, etc.).
@app.route('/'): This is aroute()decorator that defines the URL path for the home page (/). The function below it will be executed when the home page is accessed.app.run(): Runs the application on a local development server. Thedebug=Trueoption enables debug mode, which helps in identifying issues during development.
-
run the application
- To enable debug mode, use the
--debugoption.
- To enable debug mode, use the
-
Set the FLASK_APP Environment Variable: You need to tell Flask where your application is located by setting the FLASK_APP environment variable
export FLASK_APP=hello.py- Enable debug mode
# export FLASK_ENV=development
flask run --debugger- Run the development server through the Flask CLI
flask run- You can also call
app.run()directly
python3 hello.py-
Once the server starts, navigate to
http://127.0.0.1:5000/in your browser to see the outputHello, World!- If another program is using port 5000, either stop the other program, or use
flask run --port 5001to pick a different port.
- If another program is using port 5000, either stop the other program, or use
-
To make the server accessible from a computer other than your own, you can:
- add
--host=0.0.0.0to the command line
- add
# Tell operating system to listen on all public IPs.
flask run --host=0.0.0.0- Alternatively, you can modify the app.run() method in your code to specify the host and port explicitly:
if __name__ == "__main__":
app.run(host='0.0.0.0', port=5000)- Use the route() decorator to bind a function to a URL
- Users are more likely to like a page and come back if the page uses a meaningful URL they can remember and use to directly visit a page
@app.route('/')
def index():
    return 'Index Page'

@app.route('/hello')
def hello():
return 'Hello, World'- You can add variables to your application routes by using path parameters in the route definition
- Your function then receives the <variable_name> as a keyword argument.
- Optionally, you can use a converter to specify the type of the argument like converter:variable_name
from flask import Flask

app = Flask(__name__)

@app.route('/user/<username>')
def show_user_profile(username):
    return f"User Profile: {username}"

@app.route('/post/<int:post_id>')
def show_post(post_id):
    return f"Post ID: {post_id}"

if __name__ == '__main__':
    app.run(debug=True)
Rendering Templates
Generating HTML directly in Python can be cumbersome and insecure due to manual HTML escaping. Flask simplifies this process by automatically configuring the Jinja2 Template Engine
- Render a template using the
render_template()method, providing the template name and any variables as keyword arguments. Here’s a simple example:
from flask import render_template

@app.route('/hello/')
@app.route('/hello/<name>')
def hello(name=None):
return render_template('hello.html', person=name)- Create Example Template
-
Case 1: Module Structure
/application.py /templates /hello.html -
Case 2: Package Structure
/application
    /__init__.py
    /templates
        /hello.html
-
<!doctype html>
<title>Hello from Flask</title>
{% if person %}
  <h1>Hello {{ person }}!</h1>
{% else %}
  <h1>Hello, World!</h1>
{% endif %}
In templates, you have access to the config, request, session, and g objects, as well as functions like url_for() and get_flashed_messages().
Flask Tutorial- Simple Web App
Flask Tutorial- Simple Web App
Python/Flask in VS Code Tutorial
https://code.visualstudio.com/docs/python/tutorial-flask
-
create folder (e.g.
flask_vscode_tutorial) -
create virtual environment
- Open command Pallette → venv → Python: Create Environment → Python3.9
-
Run ctrl+shift+` to create new terminal
- VS Code also activates the virtual environment automatically by running its activation script (
activate.ps1) - command prompt should show
(.venv)
- VS Code also activates the virtual environment automatically by running its activation script (
-
If you open a separate command prompt or terminal, activate the environment by running
source .venv/bin/activate(Linux/macOS) or.venv\Scripts\Activate.ps1(Windows). -
Install Flask in the venv
python -m pip install flask- create app.py
- Use
app.route("/")decorator to map the URL route to a function (in other words, ”/” is an endpoint (route) for the homepage)
- Use
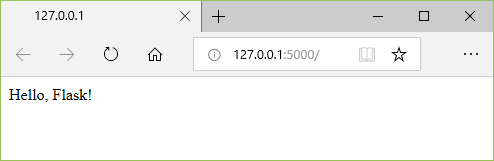
@app.route("/")
def home():
return "Hello, Flask!"- Run the app (the development server looks for app.py by default)
- When using a filename other than
app.py, you need to set an environment variableFLASK_APPto the filename
- When using a filename other than
flask run- To open your default browser to the rendered page, Ctrl+click the http://127.0.0.1:5000/ URL in the terminal
# A message in the debug terminal showing the HTTP request
127.0.0.1 - - [11/Jul/2018 08:40:15] "GET / HTTP/1.1" 200 -- Observe that when you visit a URL like /, the browser sends an HTTP GET request to the server
- The Flask app looks for the matching route (
@app.route("/")) and runs thehome()function. - The server then sends the response,
"Welcome to the homepage!", which is displayed by the browser.
- The Flask app looks for the matching route (
Run the app in the debugger
https://code.visualstudio.com/docs/python/tutorial-flask#_run-the-app-in-the-debugger
Use a template to render a page
https://code.visualstudio.com/docs/python/tutorial-flask#_run-the-app-in-the-debugger
-
You can keep HTML out of your code entirely by using templates, so that your code is concerned only with data values and not with rendering.
-
Create file
templates/hello_there.html
<!DOCTYPE html>
<html>
    <head>
        <meta charset="utf-8" />
        <title>Hello, Flask</title>
    </head>
    <body>
        {%if name %}
            <strong>Hello there, {{ name }}!</strong> It's {{ date.strftime("%A, %d %B, %Y at %X") }}.
        {% else %}
            What's your name? Provide it after /hello/ in the URL.
        {% endif %}
    </body>
</html>- Modfiy
app.py- the code is now much simpler, and concerned only with data values
- the markup and formatting is all contained in the template
- the code is now much simpler, and concerned only with data values
@app.route("/hello/")
@app.route("/hello/<name>")
def hello_there(name = None):
    return render_template(
        "hello_there.html",
        name=name,
        date=datetime.now()
    )
Serve static files
https://code.visualstudio.com/docs/python/tutorial-flask#_serve-static-files
Create multiple templates that extend a base template
Create a requirements.txt file for the environment
- In the terminal, run the
pip freezecommand to generate arequirements.txtfile based on the exact libraries installed in the activated environment
pip freeze > requirements.txtblinker==1.8.2
click==8.1.7
colorama==0.4.6
Flask==3.0.3
importlib_metadata==8.5.0
itsdangerous==2.2.0
Jinja2==3.1.4
MarkupSafe==2.1.5
Werkzeug==3.0.4
zipp==3.20.2
- Anyone trying to to reinstall the packages from the original environment to their own can run:
pip install -r requirements.txRefactor the project to support further development
- Project structure

Create a container for a Flask app using the Docker extension
Flask RESTful API Tutorials
- See REST, jsonify()
- https://flask-restful.readthedocs.io/en/latest/quickstart.html#a-minimal-api
- Flask RESTful API Best Practices
- In this guide, the following topics are covered: APIs vs WebServices, HTTP methods vs CRUD, and endpoints best practices.
- Developing RESTful APIs with Python and Flask
- we will use Flask and Python to develop a RESTful API. We will create an endpoint that returns static data (dictionaries). Afterward, we will create a class with two specializations and a few endpoints to insert and retrieve instances of these classes. Finally, we will look at how to run the API on a Docker container